How to Set the Timezone and Configure NTP on Windows Server?
Network Time Protocol (NTP) operates as a dedicated networking protocol designed to synchronize time across computer systems and devices within packet-switched networks that experience inconsistent latency.
Windows 11 system normally synchronizes its clock with Microsoft’s time server time by default. windows. com. There exist certain instances where utilizing an alternative NTP (Network Time Protocol) server becomes necessary. The default server might be unreachable or you may prefer using a local time server specific to your region.
This knowledge base guides you on how to set a time zone and configure NTP on a windows server.
Set the Timezone
- Click the Start Menu and open Server Manager.
- Look for Time zone under the Local Server section.
- Click on the current timezone (it’s usually UTC Coordinated Universal Time by default).
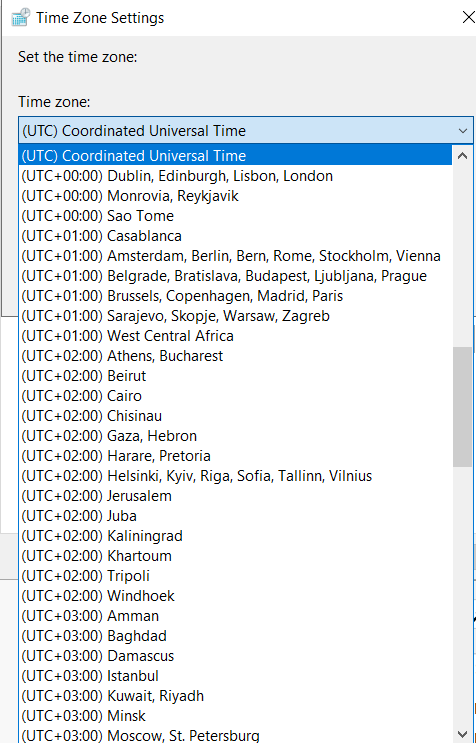
- In the Date and Time window, select Change time zone.
- From the dropdown, pick the timezone that matches your server’s location.
- Hit OK to save your choice.
- Click Apply to make the changes active.
- Go back to Server Manager to make sure the new timezone is showing correctly.
Set the Timezone using PowerShell
1. Open Windows PowerShell from the start menu, or open the Run Dialog Box (Win key + R), type powershell in the search bar, and proceed to start PowerShell.
2. To check the server timezone, run the below command.
PS > Get-Timezone
3. View all the time zones.
PS> Get-Timezone -ListAvailable
Use the below command to filter by name, and to find your target timezone.
PS> Get-Timezone -ListAvailable | Where-Object {$_.displayname -like "*India*"}
The command displays all names containing the characters India. Choose a different string like New York.
4. Change the timezone.
PS> Set-Timezone -Name "Indian Standard Time"
There is also an option to change the timezone by ID.
PS> Set-Timezone -Id "Indian Standard Time"
NTP Configuration Windows
Besides setting the timezone, Windows can be configured to use NTP, to synchronize the time.
- Open the Run dialog window by clicking the Windows key (WIN) + R.
- In the search bar, add
regeditand click OK to start the Registry Editor. - Expand the registry navigation tree : HKEY_LOCAL_MACHINE ➔ SYSTEM ➔ CurrentControlSet ➔ Services
- Expand W32Time.
- Click Config.
- Select AnnounceFlags
- Add
5in the Value data field. - Click OK to save changes.
- Finally, click Parameters, In the left pane.
Read our knowledge base guides you on Set the Timezone and Configure NTP on Rocky Linux.
Configure NTP Using PowerShell
To configure NTP using Powershell, use the below commands.
1. Open the PowerShell with administrative privileges.
2. Verify status of NTP time synchronization.
PS> w32tm /query /status
3. Type the below command to set the time AnnounceFlags to 5.
PS> Set-ItemProperty -Path "HKLM:\SYSTEM\CurrentControlSet\services\W32Time\Config" -Name "AnnounceFlags" -Value 5
4. Enable NTP Server.
PS> Set-ItemProperty -Path "HKLM:\SYSTEM\CurrentControlSet\Services\w32time\TimeProviders\NtpServer" -Name "Enabled" -Value 1
5. Restart the Windows Time.
PS> Restart-Service w32Time
6. Finally, test the NTP synchronization.
PS> Restart-Service w32Time
The time zone has been set successfully and configured NTP on Windows Server.
Conclusion
Once you finish setting the timezone and NTP on your Windows Server, you don’t have to worry about the clock going out of sync. The server will keep the right time on its own, which makes things like scheduled tasks, event logs, and network services run smoothly. It’s a simple setup, but it saves you from a lot of small problems later.
To find the latest information and updates, please refer the below links:
Official NTP Documentation , List of database TimeZones